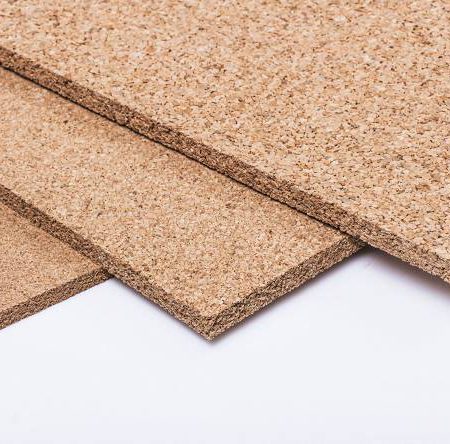
Cork sheets
If you are looking for cork sheets, you are probably thinking of getting cork flooring or a cork board. You may also be considering applying a unique design in your house with a cork sheet. Or maybe you just want to use it in your restaurant? And to have eco-friendly coasters, which will last for a long time? Well, you can choose to use cork sheets in various ways…
The cork has the ability to suppress air sounds in the range from 400 to even 4000 Hz. This makes it an ideal acoustic isolator. What’s more, products of cork origin like wall cork or cork underlay also damp vibrations, effectively cushioning them. Thanks to this, all vibrations are perfectly suppressed and the room becomes more comfortable. You can also use the vibration isolation properties of cork in the engineering industry to protect devices against vibration arising during their operation. Architects and interior decanters often use cork boards for finishing and decorating walls. Sheets are available in the form of various types.
Take a look at our cork sheets UK offer.
Showing 1–24 of 32 results
Energy saving through thermal insulation with cork panels.
Thermal insulation with cork panels can contribute to significant energy savings in a building. The advantages of thermal insulation with cork panels include:
Savings on heating and cooling costs:
Cork panels have insulating properties, both thermal and acoustic. They improve the building’s ability to maintain a stable temperature, resulting in lower energy consumption for heating in winter and cooling in summer.
Reduction of heat leakage:
Cork is a material with low thermal conductivity, meaning it restricts the flow of heat between the inside and outside of the building. This reduces heat loss and the need for constant heating or cooling.
Increase of energy efficiency:
Improving thermal insulation helps increase the energy efficiency of the building. This reduces energy consumption, which has a positive effect on the energy bill.
Thermal comfort:
High-quality thermal insulation made from cork panels leads to better thermal comfort inside the building. It eliminates cold spots and maintains an even temperature, making residents feel more comfortable.
Durability and low heat transfer:
Cork is characterized by low heat transfer, which means that this material has the ability to maintain a constant temperature over a long period of time. This helps to stabilize the thermal conditions in rooms.
Balanced character:
Natural cork is an ecological material that is obtained from the bark of the cork oak tree without having to cut down trees. Using cork insulation supports sustainability and helps reduce your carbon footprint.
Environmental Protection:
Cork is biodegradable and recyclable, making its production and use more environmentally friendly than some other insulation materials.
Long-term benefits:
Although investing in thermal insulation with cork panels may initially involve some costs, in the long term it brings significant benefits in the form of savings in energy costs.
It should be emphasized that the effectiveness of the insulation depends on the quality of the materials and professional installation. Therefore, it is important to consult a thermal insulation expert to select the appropriate materials and installation methods for specific building conditions.
Attaching cork boards to the wall.
1. Prepare the wall:
Make sure the wall is clean, dry and smooth. If there are any unevenness, these should be leveled out.2. Unpacking the material:
Remove the cork panels from the packaging and leave them indoors for a few days to adjust to the humidity before installing.
3.Measuring and Cutting:
Measure the exact dimensions of the wall where the panels will be installed. Then make cuts if necessary.
4. Layout planning:
Before you start gluing the planks, plan the layout and decide where to start and in which direction they should be laid.
5. Preparation of glue:
Use cork glue or contact glue. Prepare the glue according to the manufacturer’s instructions.
6. Apply glue:
Spread the glue evenly on the back of the cork boards and on the wall according to the glue manufacturer’s recommendations.
7. Placing the panels:
Place the first cork board according to the planned layout and gently press it against the wall.
8. Pressing and leveling:
Use a pressure roller to ensure that the panel adheres evenly to the wall. Check that the boards are aligned evenly.
9. Gluing the following planks:
Continue applying glue and laying more planks until the entire surface is covered.
10. Expandability:
Leave a small gap between the boards and adjacent trim or other surfaces to allow the material to expand and contract naturally.
11. Explanations:
Once all the floorboards are installed, install skirting boards or other decorative elements to aesthetically complete the project.
12. Cleaning and Maintenance:
Follow cleaning and care recommendations for cork tiles to maintain their durability and aesthetics.

